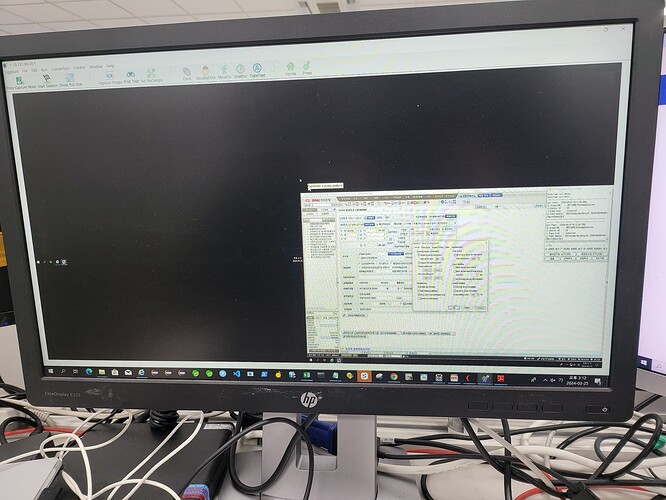
I installed TightVNC on my SUT PC and set the settings in the connection list to Auto VNC to connect, and the screen is showing up at a quarter size.
What’s the problem?
Hello,
The issue you’re experiencing with TightVNC displaying a quarter-sized screen when connecting with “Auto VNC” likely stems from a mismatch in screen resolution or scaling settings between your client (the machine you’re viewing from) and the server (your SUT PC). Here’s a breakdown of common causes and troubleshooting steps:
Possible Causes:
Resolution Mismatch:
The server’s screen resolution might be significantly higher than your client’s, and “Auto VNC” might be defaulting to a scaled-down view to fit within your client’s window.
The TightVNC server might be configured to use a specific, smaller resolution.
Scaling Issues:
Windows display scaling on either the client or server could be interfering with TightVNC’s rendering.
TightVNC’s own scaling options might be set incorrectly.
Graphics Driver Issues:
Outdated or corrupted graphics drivers on the server could cause display problems.
TightVNC Server Settings:
The server may be set to a specific resolution.
Troubleshooting Steps:
Check Server Resolution:
On the SUT PC (the server), go to your display settings (usually by right-clicking the desktop and selecting “Display settings”).
Note the current screen resolution.
Compare this resolution to the resolution of your client machine.
Adjust TightVNC Server Settings:
On the SUT PC, open the TightVNC Server application.
Look for settings related to “Screen Size” or “Resolution.”
Try setting a specific resolution that matches or is close to your client’s resolution.
Restart the TightVNC server service after making changes.
Client-Side Scaling:
On your client machine, check your display scaling settings. In Windows, this is found in the display settings.
Try setting the scaling to 100% to ensure no unexpected scaling is occurring.
TightVNC Viewer Scaling:
When you connect with TightVNC Viewer, look for options related to scaling or “Full Screen.”
Ensure that the viewer is not set to a scaled-down view.
Try the full screen option.
Graphics Drivers:
On the SUT PC, update your graphics drivers to the latest version from the manufacturer’s website (e.g., NVIDIA, AMD, Intel).
Color Depth:
Sometimes, an incorrect color depth setting can cause display issues. Try changing the color depth setting in the TightVNC server configuration.
Try a Specific Resolution in the Client:
Instead of auto VNC in the client connection manager, try to set the resolution of the server manually to that of the server.
Firewall and Network:
While unlikely to cause a quarter sized screen, ensure that your firewall is not interfering with TightVNC’s connection.
Network latency can sometimes exacerbate display issues, so try connecting over a wired connection if possible.
How to Change TightVNC Server Resolution:
Locate the TightVNC Server Icon:
It’s usually in the system tray (the area near the clock).
Right-Click and Select “Configure”:
Right-click the TightVNC Server icon and choose “Configure.”
Go to the “Display” or “Screen” Tab:
The exact tab name might vary slightly depending on your TightVNC version.
Adjust Resolution Settings:
Look for options to set the screen resolution.
Select a resolution that matches your client’s screen or a common resolution like 1920x1080.
Apply Changes and Restart:
Click “Apply” or “OK” to save the changes.
Restart the TightVNC service.
Best Regards
